|
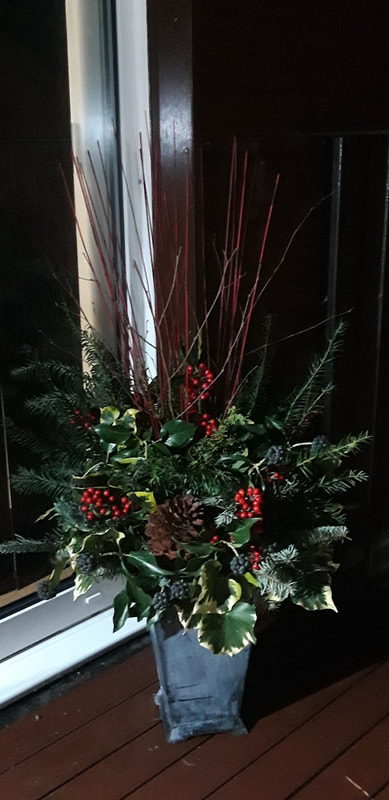
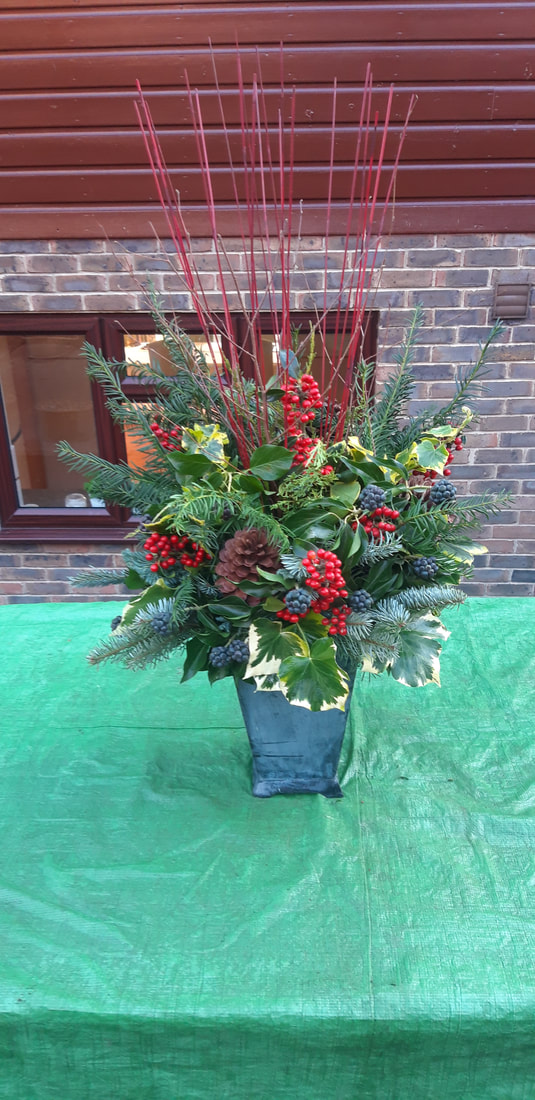
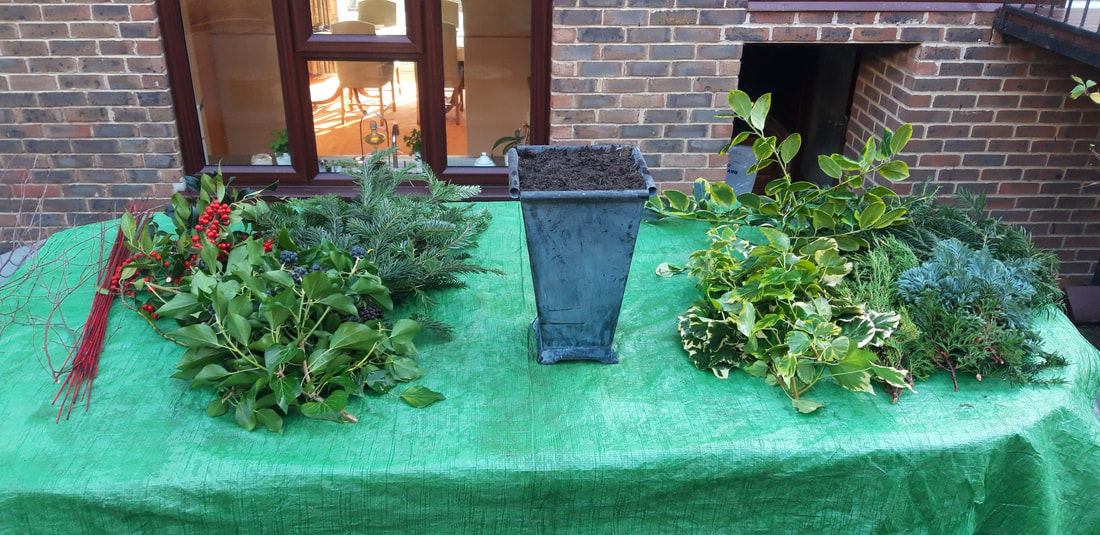
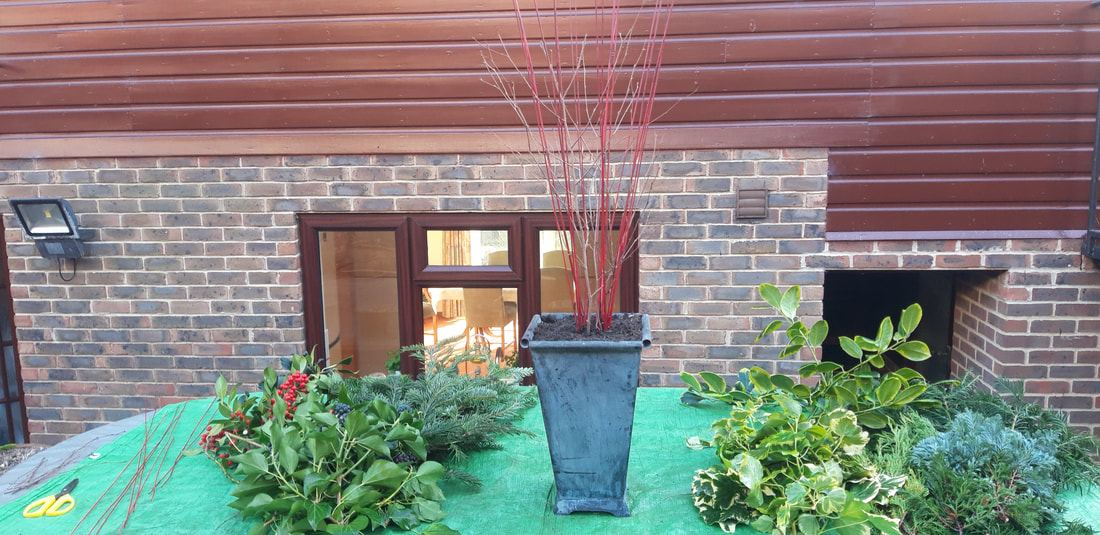
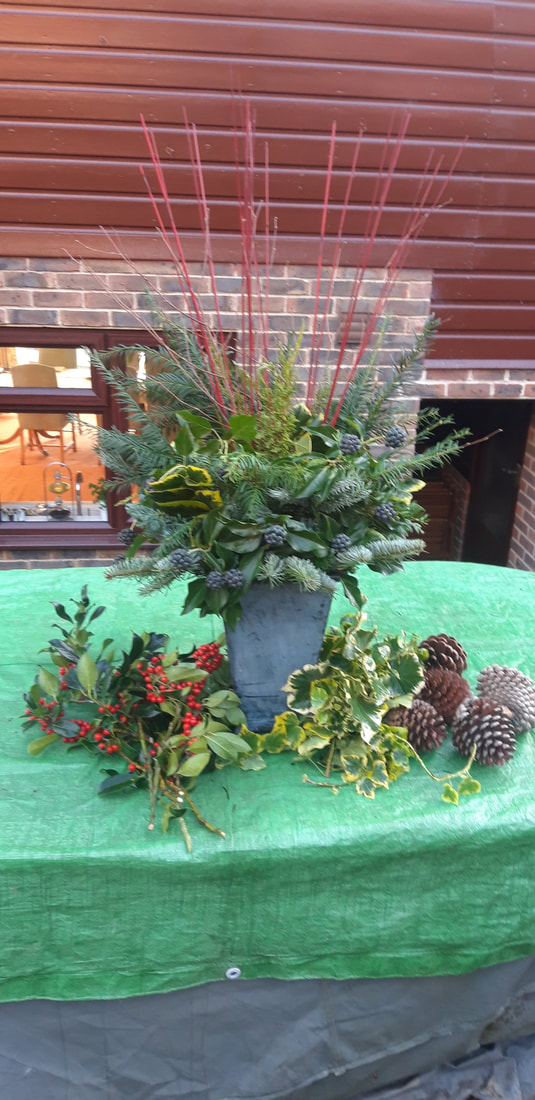
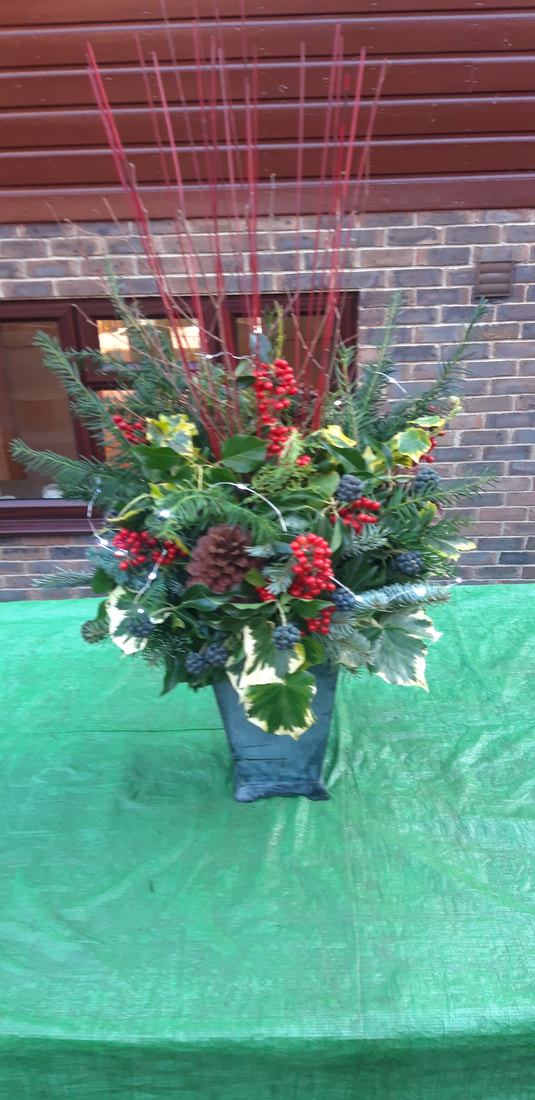
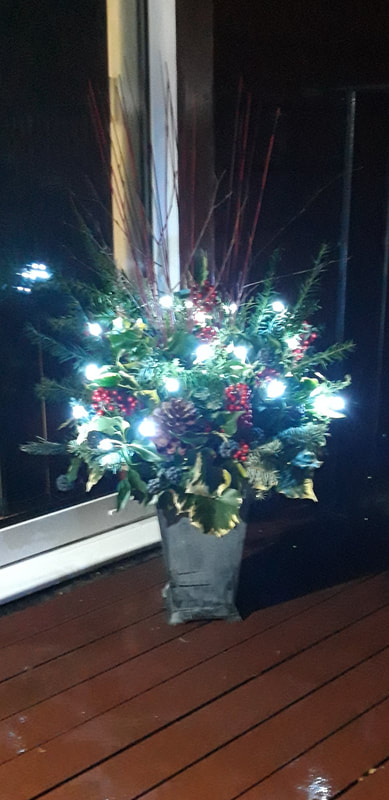
Behind the 16th door on our Virtual Advent Calendar we have an idea for a welcome arrangement to decorate outside a house or a porch. The design comes from Rosina Horton, Executive Member and Chairman of Folkestone Flower Club Scroll down to below the design for Rosina's instructions on how to recreate the design and some step by step photographs. Don't forget to come back tomorrow
MECHANICS: This is a no foam arrangement for which you need:
FOLIAGE:
METHOD: Line the container with the plastic and fill to the top with the very damp compost. Press down to make it very firm. Starting in the middle, I have pushed in the reeds and birch. Next the yew and conifer. This will help support the central placements. Surround with the rest of the foliage, starting with the tallest and graduating towards the outside of the container with the shortest stems. Have some of the foliage hang over the edge to soften it. Add the ivy berries, holly berries and large pine cones. Keep watered and outside in the cold to prolong the arrangement. If the soil dries the arrangement will start to move. The possibilities for this design are endless. Use whatever you have available to you, dried or fresh. Have fun
Welcome to the 15th day of our Advent Calendar. Today we have some tips from our Photography Rep, and member of Dartford Flower Club, Pauline Pearce. Pauline has two tips for us so do scroll down to see them both Pauline's First Tip: Many of us put our Christmas trees in our windows so that they can be enjoyed from inside and out which is lovely. However, if you want to include your tree in photographs then think about your lighting. If you take photos directly into the light or the sun then the foreground can be very dark or the light behind can over expose part of the picture. Try to position yourself with the light coming in from your side, from behind you, or if this is not possible then consider closing the curtains or blinds behind your tree. In the first example taken into the light the background of this little tree is over exposed and some of the definition around the top of the tree is lost. The strong light also detracts from the tree itself. In the second image the light comes from behind the photographer and you can see the tree in more detail. This little tree has been designed and made by Betty Taylor, Dartford Floral Club, in aid of Kent Air Ambulance.
Pauline's Second Tip: When photographing your floral designs remember to quickly check the background. In this example you can see that the curtains in the background of the first image detract from the beautiful design. This design was created by Betty Taylor of Dartford Flower Club
Happy snapping!
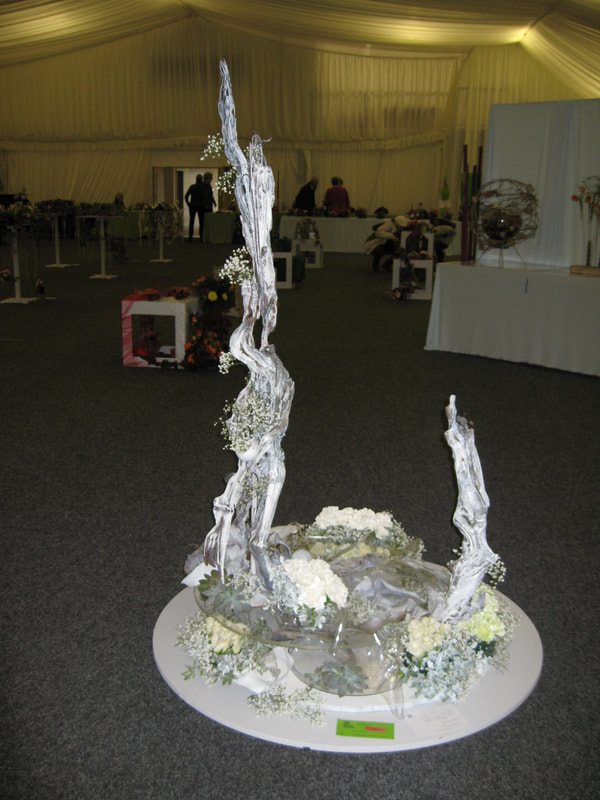
Welcome back to the Virtual Advent Calendar of Kent Area. Today we have something special as National Speaker and member of Maidstone Flower Club, Sue Shaw, presents The Song of the Flower XXIII by Khalil Gibran which was written in 1914. We are sure you will enjoy this evocative poem which is beautifully presented by Sue Don't forget to come back tomorrow to see what is "behind" our next window Behind the door of our virtual Advent Calendar we have a blast from the past. Back in November 2013 we had an Area Show entitled "Deep Crisp and Even". The club class of the same name was won by Ashford Flower Club. The exhibit was designed by Patricia Bashford and Jean Sullivan and we are sure you will agree it was very evocative of the title. Don't forget to come back tomorrow to see what is behind the next door
Welcome to day 12 of our Virtual Advent Calendar. Today we have an elegant design produced by demonstrator and member of Paddock Wood Flower Club, Sue Thompson. We love the combination of the rich colours of Christmas, with the pussy willow giving a hint of spring to come. If you scroll down beneath the photograph you will find Sue's step by step to help you create a similar design Don't forget to come back tomorrow!  SUE’S STEP-BY-STEP
You will need: Floral foam – 1/3 block Dish Container Tape 3 - 5 stems pussy willow 5 stems of foliage – I used senecio (brachyglottis) for its velvet texture leaves and grey/white colour 8 roses – Naomi is a voluptuous red rose 5 – 7 carnations – green or Green Trix has a lovely feathery texture and soft round form A few pieces of gypsophila (optional) 2 or 3 stems of hypericum berries – red - (strip off leaves) 2 or 3 medium sized baubles – on kebab sticks (secured with hot glue) 2 or 3 dried lotus seed heads – on wire Preparation: Tape 1/3 block of soaked floral foam into a dish that fits the neck of your chosen container. The container I chose is glass within a metal framework, I softened the look of this by arranging a length of organza fabric in the container. It also avoids the arrangement looking like it is “floating” in the air. The dish I used is an Oasis clear “rampside dish”. Method:
We have an exciting video behind the virtual door of our advent calendar today with a demonstration by National Demonstrator and member of Sheldwich Flower Club Jacqui Arnold. Don't forget to come back tomorrow! Welcome to our Advent Calendar for the 10th December. Today our Education Rep on JDSE&P and member of Dover Flower Club, Cicely Finnis shows us how to make a welcome bowl. Cicely says: "This is a style suitable for a porch, entrance hall or table as a welcome to the house at Christmas time. It is ‘an anything goes’ arrangement where you do not need specific materials so you can use what you have to hand, hence it can be a very economical design to create. The design is worked mainly in blocks of colour and texture so look round for good contrasts. Seasonal foliage and berries can be interspersed with Christmas baubles, fir cones, sprayed twigs, nuts, flowers etc, remembering to keep the components in scale, especially if you wish to use a candle in the centre. At Christmas artificial plant material can supplement fresh material if you do not have that available. Moss is a useful addition to conceal the floral foam. The arrangement is worked in a low lying bowl with a large opening, a plant saucer is ideal if you don’t have a suitable bowl. Place several blocks of floral foam in the bowl ensuring that it is raised about 1’’ above the top of the container. Start with something tall in the centre of the bowl and work in blocks of contrast over the bowl until you are satisfied with the finished design. Have fun and enjoy creating your arrangement. Happy Christmas to everyone and lets hope for a better 2021. The photographs show the different stages and some of the individual plant material, berries and cones can be enhanced by spraying or with rub and buff".
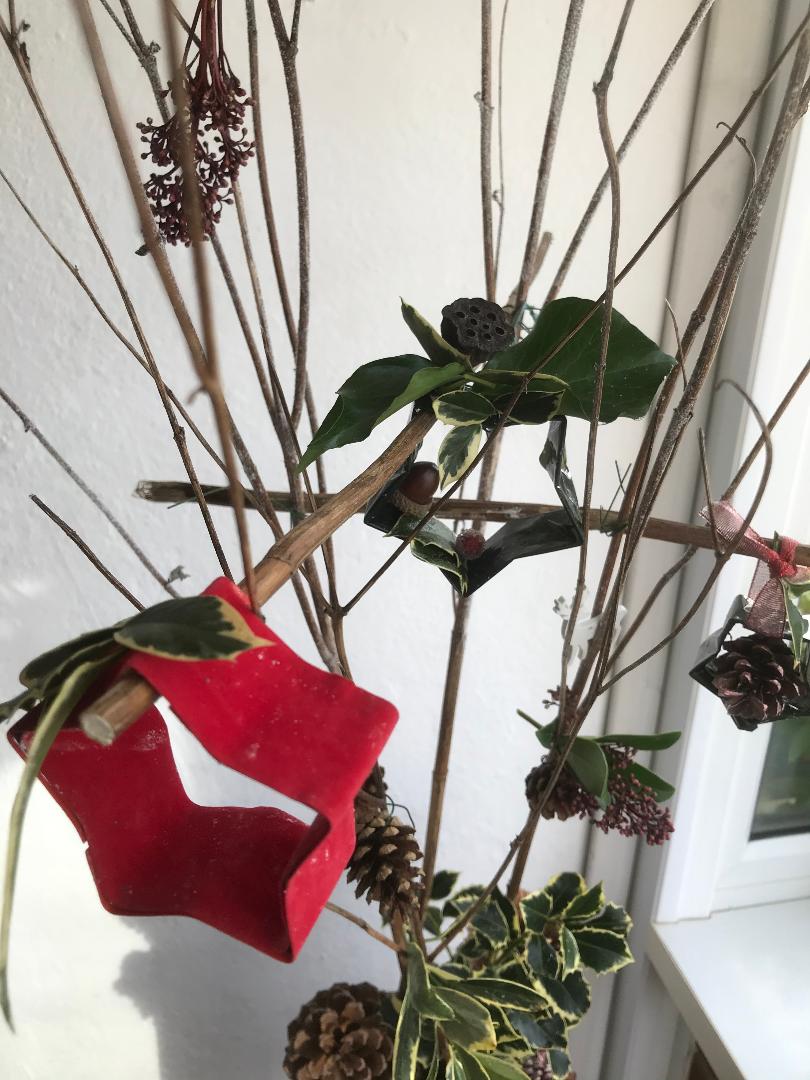
 Today on the advent calendar we would like to introduce you to Monty and Maissie who are the mice featured in Patricia Ellis' elegant design. Patricia is a demonstrator and member of Sevenoaks Flower Club. Don't forget to come back tomorrow to see what we have in store for you  Welcome to our Advent Calendar for the 8th December. Today we have a different idea for creating decorations from Lillian Pine of Romney Marsh Flower Club Lillian says: "Once you have made your cookies and mince pies why not use your star shape cookie cutters to make some decorations for the Xmas tree. All you need is some foliage from the garden, double sided tape or glue, wool etc." You can use any shapes that you have in your cupboards and after Xmas they can then all be cleaned and ready for next years cookie making. We hope you enjoy having a go. Don't forget to come back tomorrow to see what is on our virtual calendar
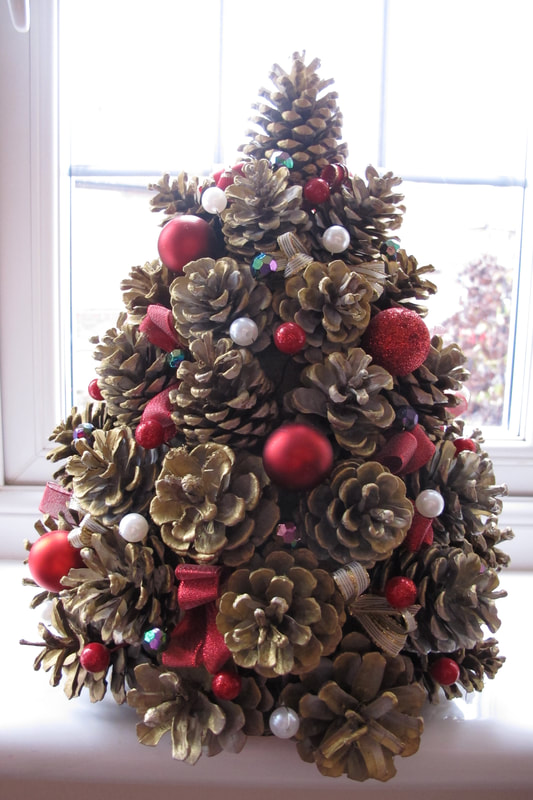
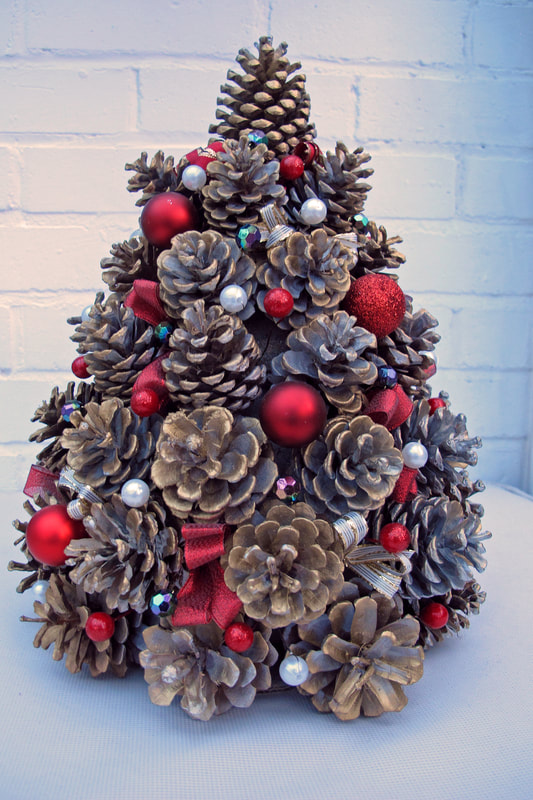
Behind today's virtual door on the advent calendar is a Steampunk-inspired wreath by Zoe Hawkins of Herne Bay Flower Club Zoe calls her design "Strictly Steampunk" and says "Inspired by the article in the Winter Flower Arranger, page 29, I sent for a packet of assorted wooden cut out cogs. My base was an old smooth willow woven ring that I had kept from a Vanguard Workshop. I only had navy blue spray [no black left] for the twigs and I acryllic painted the cogs gold and copper. They became my flowers. I found the sparkly holly leaves, that had once been a lucky sale buy, that seemed to soften the hard metallic look that I was aiming to achieve. The copper coloured cones were old tree decorations and I felt they said Christmas. Contemporary, Traditional, Strictly Steampunk ??? You choose. Don't forget to come back tomorrow to see what is "behind" the next virtual door 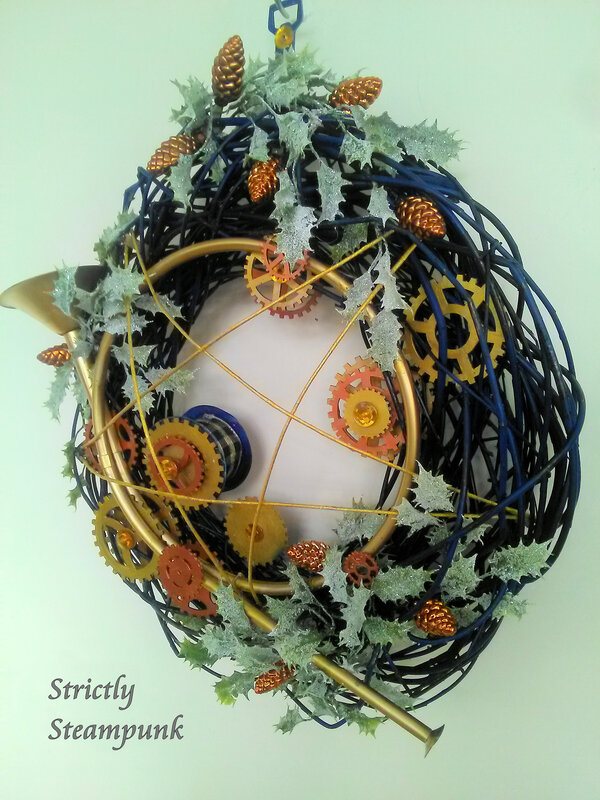 We hope you are enjoying our Area Advent Calendar. Today we have a Christmas craft idea from Vicki Hodgkiss. Vicki is our Area Speaker's Rep and a member of Canterbury Flower Club. Vicki has made this mini-Christmas tree from pine needles! She says: Greetings to you all "I have several Scots pines in my garden and had the mad idea to use their needles to make a mini Christmas tree. It does take a while but in Lockdown what a pleasant way to spend a few hours. You could of course use other conifers eg Lleylandii". Details of what you need to make one and instructions are underneath the picture so keep scrolling down. Don't forget to come back tomorrow to see another exciting design  Mini Pine Tree
What you need
Method
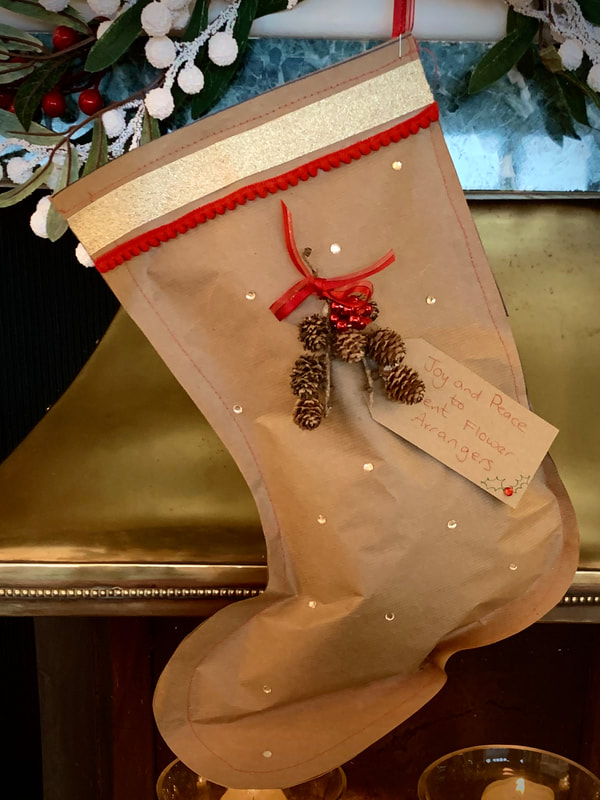
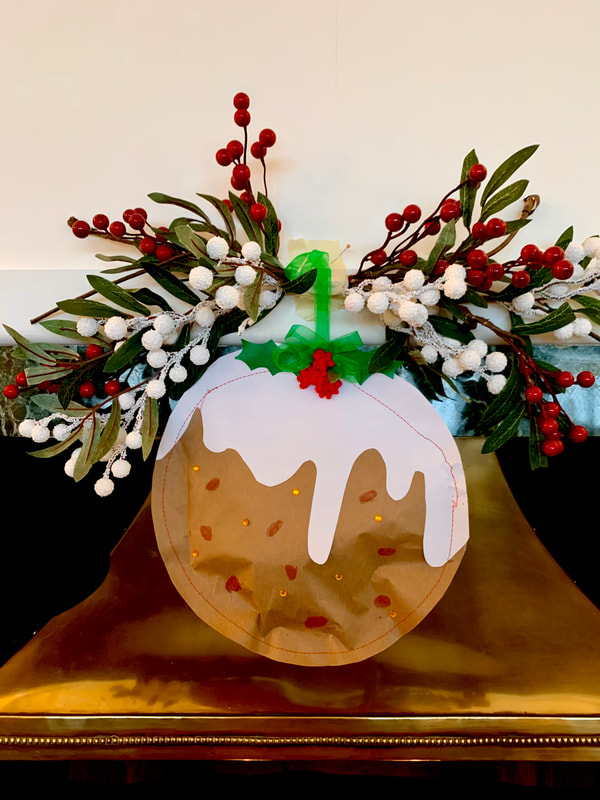
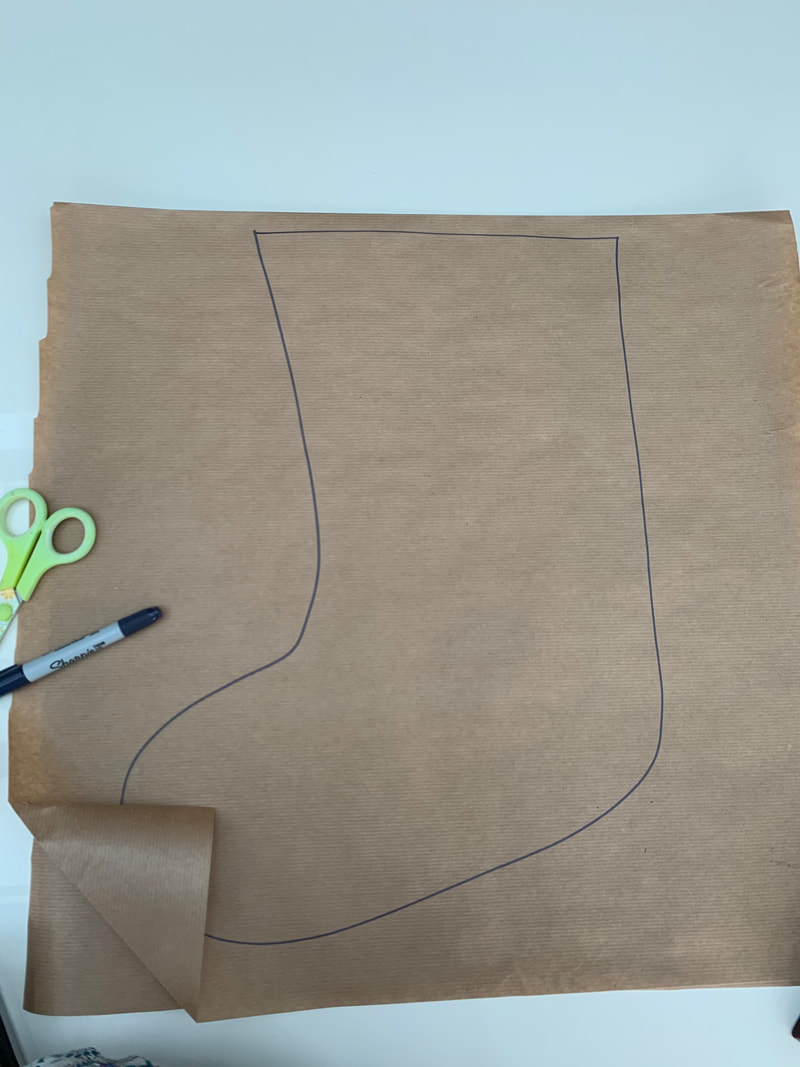
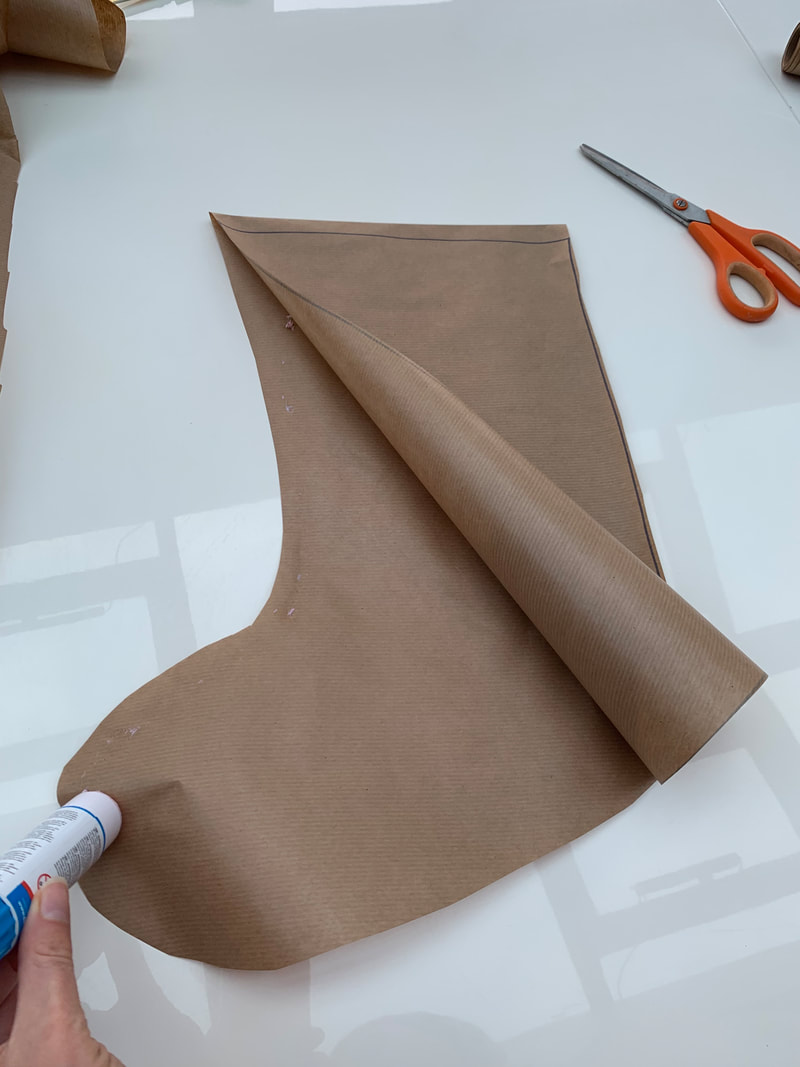
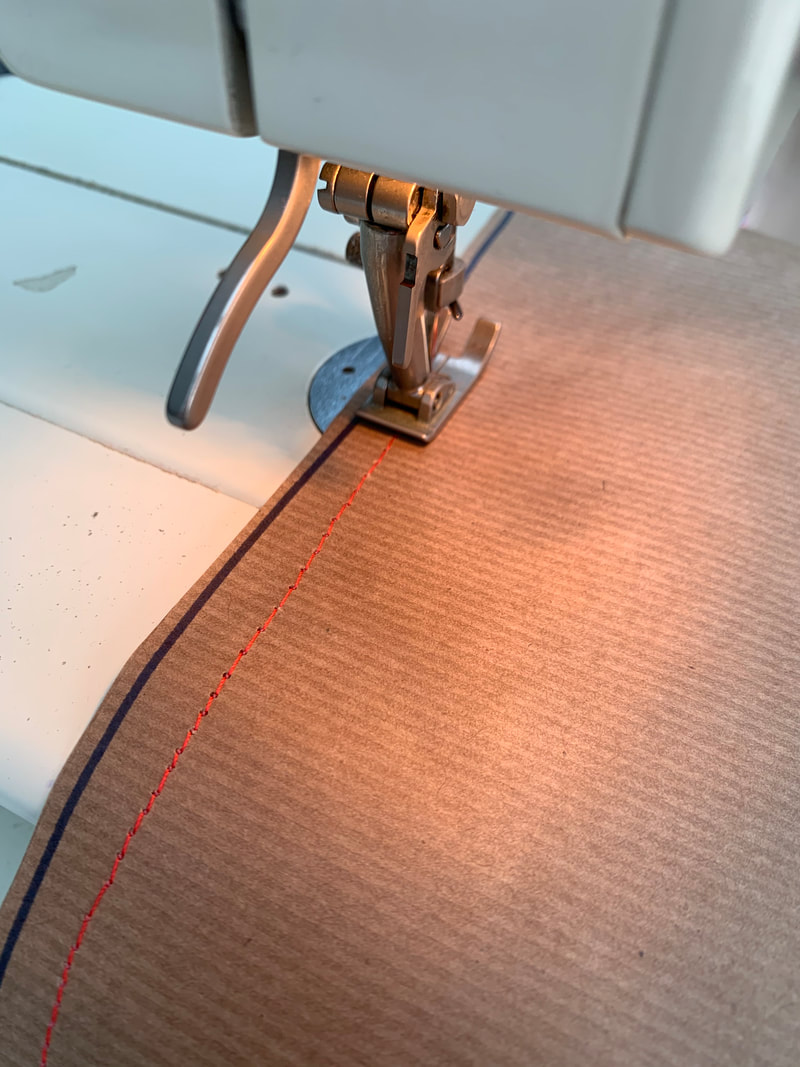
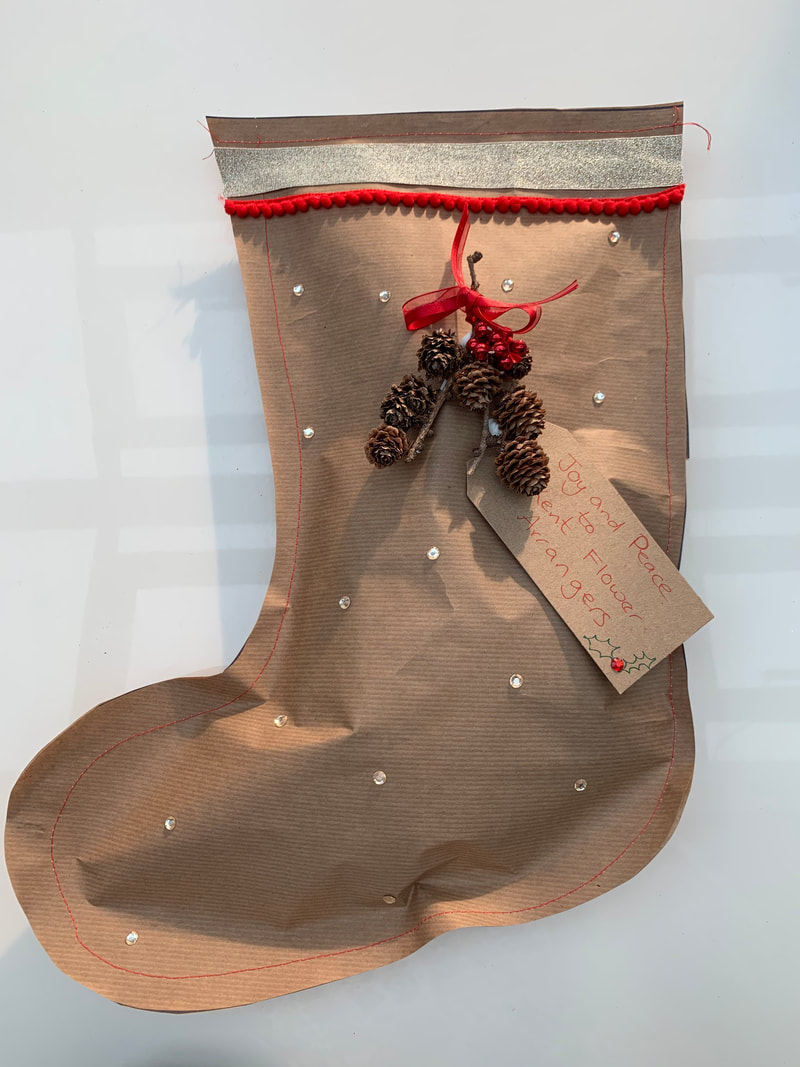
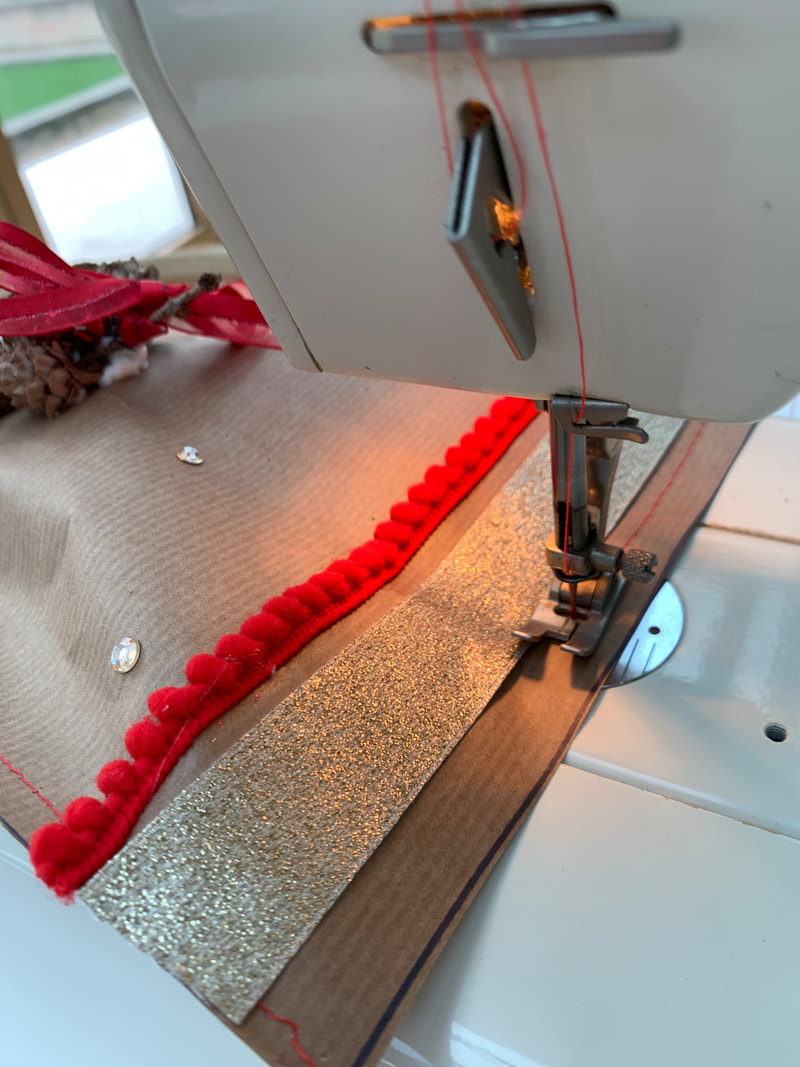
GOOD LUCK Today we have a talk from Speaker Liz Hall of Maidstone Flower Club. Liz is talking to us about Christmas foliage. Just click on the link below or visit our You Tube channel Don't forget to come back tomorrow to see what we have for the next "window" on our advent calendar Today we have an elegant chandelier arrangement by Chrissie Jenkins of Wateringbury Flower Club Chrissie said: "I had always wanted to create a Christmas Chandelier and had such fun making it! Here are a few tips: 1) Start with a large, flat, wreath ring or something similar. Glue onto it 4 or 6 plastic tin can covers (Lakeland) or plastic covers from yoghurt pots. These will support your candles so need to be carefully spaced so that the ring is balanced when hanging. 2 )Attach the rope, plaited string or ribbon which will allow you to hang the chandelier. These too must be evenly spaced. NB only use 3 strands (the three legged milking stool principle) or it it will be very difficult to get it to hang level! 3)Now the fun bit! Simply weave foliage round the ring, securing with wire and adding baubles, icicles, ribbon and as much bling as you like, it is Christmas! NB. You will need a lot more foliage than you think and I would use LED candles with a remote control. Without the remote, each candle has to be removed individually to light, as the switches are underneath, that’s a pain and unbalances the chandelier too. Use real candles at your peril! Don't forget to come back tomorrow for another exciting design 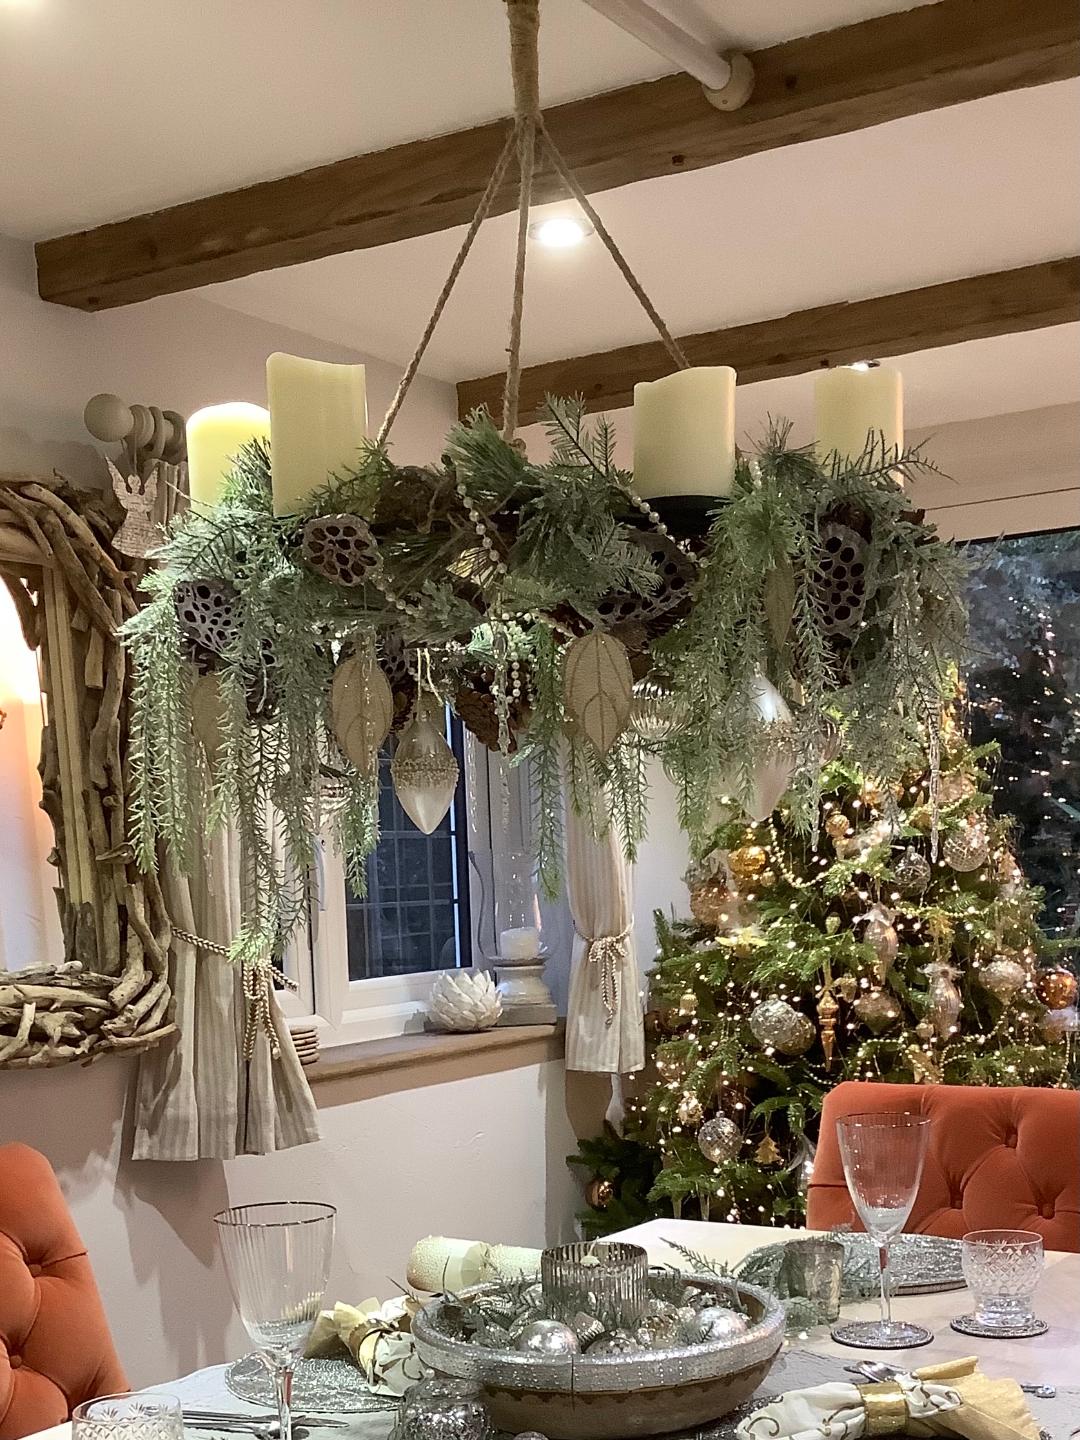 Today we have an idea for making some interesting designs for wrapping those smaller gifts. The innovative design was created by Area Vice Chairman and member of Romney Marsh Club, Cecilia Sleap. This is ideal for small gifts like socks & gloves, enjoy watching as they try to open it!! Scroll down to below the first row of photographs for instructions on how to make the design and step by step photos. Don't forget to come back tomorrow for another exciting design
Christmas Gift Wrapping Worksheet MATERIALS • Brown paper. or any other strong paper • Rummage around for all those decorative bits and bobs…anything you have saved for a project just like this! • Glue, scissors. stapler, pen. • Dust off the sewing machine, or needle and thread. 1. On a double sheet of the paper, draw freehand a Christmas sock, make it generously bigger and wider than the gift . 2. Glue together around the edges, leave top open to slide the gift in. 3. Machine around the sock but not too close to the edge or it may rip easily. 4. Decorate… it’s Christmas anything goes! 5. Pop the gift inside . 6. Sew the top closed. 7. Staple a hanging ribbon on, if required. Try other shapes - Star, Bell, Pudding, Rudolf. Experiment with wallpaper, used plastic bags, greaseproof paper (for Christmas cookie gifts) Use festive colour threads
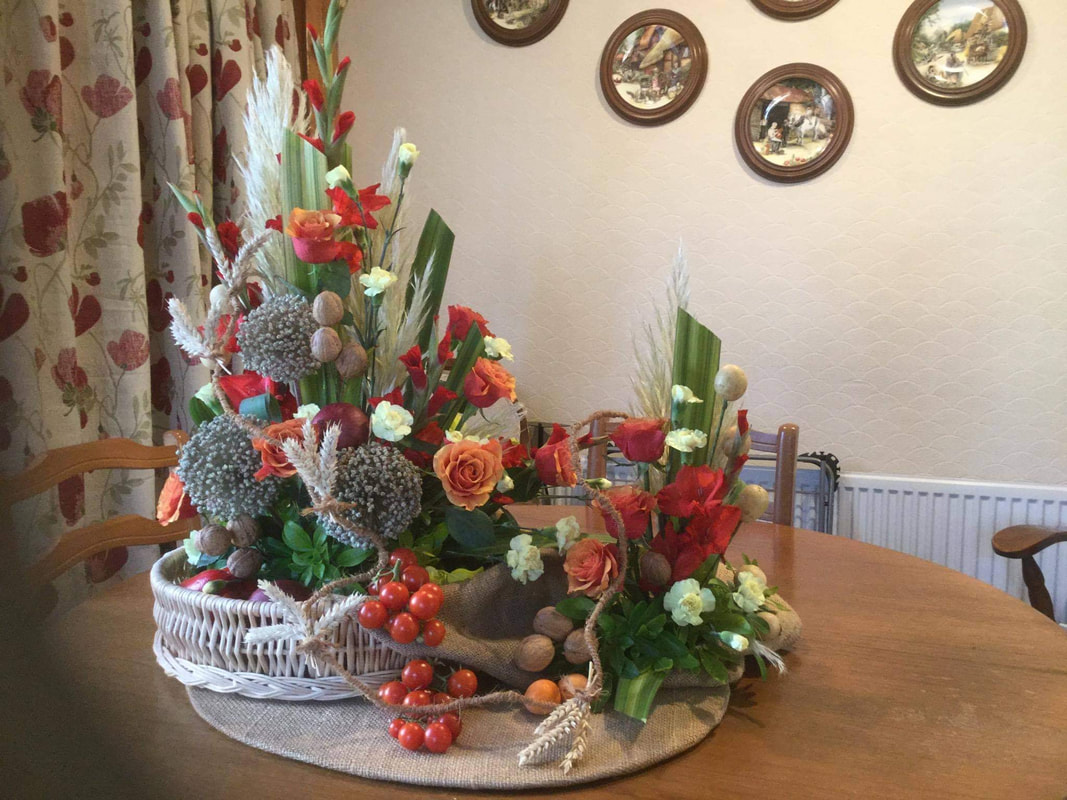
What about a floral corsage to brighten up your Christmas outfit? This fabulous festive corsage was made and modelled by Leigh Powis of Frindsbury Flower Club. Don't forget to come back tomorrow
|